Several years ago, I bought a Raspberry Pi and a fairly cheap car-rear-camera screen to use as a display, with the intention of making my own BMO. I never got around to making anything beyond the “assemble the components” stage, and I’d lost interest in Adventure Time and the project itself by the time the components were already outdated.
But I never completely lost the desire to do something with a self-contained Raspberry Pi and display. A couple of years ago, I made a Star Wars-inspired light-up box for a wedding proposal stunt, and I had so much fun doing it that I want to take on another more advanced project.
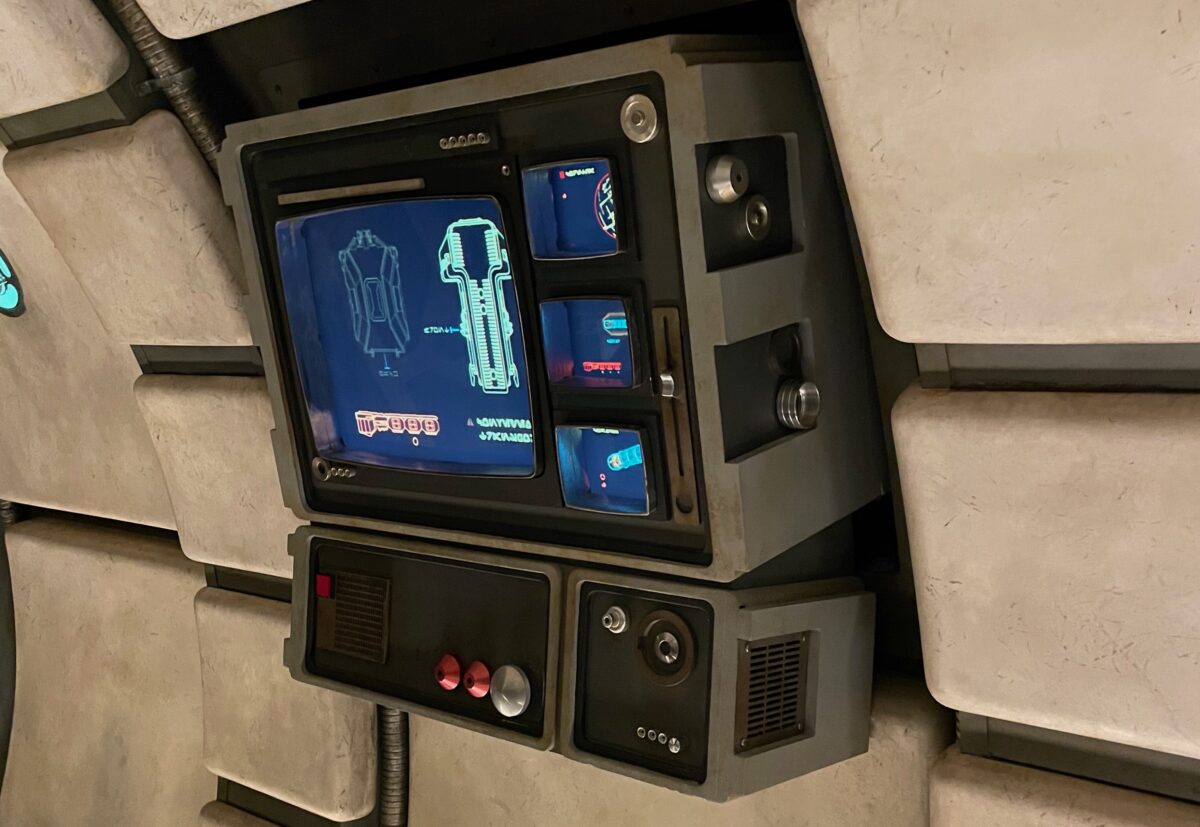
In the Smuggler’s Run ride in Galaxy’s Edge at Disneyland, there’s a short pre-show sequence (at about 5:15 in this video) right as you’re about to enter the cockpit, where Hondo Ohnaka appears on a multi-screen display and reminds you what the mission is and what the different crew roles are supposed to be. I was immediately fascinated by that display, both the motion graphics and the hardware itself. I’m now convinced I want to make that. Or more accurately: a small, desktop-friendly enclosure inspired by that.
In a perfect world, I would’ve already built it, and this blog post would just be pictures of it and an overlong description of how I made it. But while I’d rank myself as an “advanced beginner” when it comes to 3D modeling and printing, I’m still an absolute novice when it comes to assembling anything involving electronics.

Here are the components I’ve gotten so far (some from a separate Untitled Goose Game music-and-sound-playing toy project that I’ve pretty much lost interest in). It’s:
- a Raspberry Pi 4
- a pre-assembled PiTFT 480×240 display + touchscreen that attaches directly to the Pi
- two speakers
- a feather microcontroller
- a bunch of button switches
- a half-sized breadboard and a Perma-Proto board
On order I’ve got:
- Two smaller TFTs to act as “supplemental” displays
- Three illuminated push buttons
- A potentiometer I expect to use as a random knob (volume, maybe?)
All came from Adafruit.com, which is a great source not just for the components but tutorials on how to build their sample projects. Their tutorials are great, as long as you’re building what’s shown. The problem is that I never know how to depart from their tutorials and make something new. I’ve had enough practice now that I’m fairly comfortable doing stuff like soldering LEDs onto an Arduino shield, but don’t know how to bridge the gap to wiring individual buttons, potentiometers, sensors, etc that haven’t come pre-assembled.
I get the sense that the only real way to get comfortable with working with circuitry is by tinkering and experimenting. The problem is that whenever I’m in a situation without an Undo menu option, things tend to fall apart around me. Blowing out an LED isn’t a tragedy, but ruining a $40 computer or display would be pretty upsetting. It seems like going from the “make a single LED light up in response to a button” demo, to the “have multiple illuminated buttons, displays, and knobs all inter-communicating” stage would require some knowledge of how resistors work and such. I feel like an outlier based on the examples and tutorials I’ve seen so far, in that I’m pretty comfortable with programming and soldering, but don’t know where to start when it comes to designing or assembling the circuit.
So I’m hoping that someone reading this with more experience working with electronics will be able to point me to a good resource or resources for bridging the gap from beginner to advanced-beginner. Some questions I’ve got before I even get started:
- I’m assuming that the Pi and the main display could function as a unit, but all the inputs and external display would need to be run from a separate microcontroller. Is the Feather sufficient for that?
- The PiTFT leaves some of the Pi’s GPIO pins available, according to the specs. Would a microcontroller for the buttons & displays be wired directly to the PI?
- For simplicity’s sake, I was hoping to power everything with a USB cable connected to the Pi. (In other words, skipping this thing’s potential as a mobile device). Would the microcontrollers need separate power, or can they be powered via the Pi as well?
- Would each display require a microcontroller, or can they be run from the same board as the buttons & potentiometer?
- Is it madness to assume I could use that Perma-Proto board in the final project? Or would I need to look into having an actual circuit board made?
- What’s the best way to divide and conquer with a project like this? My first instinct is just to try to hook up the Feather to one of the illuminated push buttons and read/write from the button input and to the LED. Does that just naturally scale up to adding more buttons and a potentiometer, or would that significantly change the circuit and the power requirements of it?
Suggestions, warnings, tutorials, explanations are all welcomed. I’ll keep updating the status of the project — assuming there is anything to update — on this blog.
Comments
2 responses to “Star Wars Pi Project: Intro and call for suggestions”
You don’t have to use another microcontroller if you don’t want to. The Pi can theoretically drive all of this, but it would involve some pesky Linux configuration to drive the two smaller TFT displays in addition to the main one. The PiTFT only uses a handful of IO pins (mostly for SPI data), so you’d have some IO left over for LED’s and buttons and whatnot. Worst case, get a GPIO IO expander and connect it to the I2C pins on the Pi. Something like the SX1509 board from Sparkfun. That should give you more than enough IO to use.
If you want the Pi to talk to the Feather microcontroller, the easiest way is probably to connect them over the serial port (rx and tx pins, but make sure they’re both operating at the same logic voltage. The Pi uses 3.3v as its logic voltage, so make sure your Feather also runs at 3.3v for logic voltage.) The PiTFT leaves those serial pins unused, so you can still tap into them and use them.
You should be able to use a USB cable, depending on the power source. The Pi and Feather boards all run off 5v, and the smaller TFT screens have a built-in regulator to drop the voltage down to 3.3v. Just make sure you have enough amps to drive all of this though. Most computer USB ports only provide about 0.5amps of current, which isn’t going to be enough to drive all of this.
If you’re going to drive the two small TFT screens individually (not having the image mirrored from one display to the other), I suspect you’re going to need a Feather for each screen. Unless you’re feeling ambitious and want to try to do it all with the Pi, which is probably possible but not trivial.
Yeah, you can use that if you don’t feel like having a custom circuit board made.
If it were me, I’d probably connect all of my LED’s, buttons, and other sensors to the Pi along with the main TFT. And I would use two Feather boards to drive each smaller display. The Pi would then just commands over serial to the two Feather boards to tell them what images to display. Just my opinion, though. There are lot of different ways to do this.
Dang, thanks so much! That’s even more helpful than I was hoping for in my best-case response.
I think you’re absolutely right as to the overall configuration — inputs attached directly to the Pi, and a Feather board driving each smaller display. If for no other reason than that is the perfect answer to my last question about dividing-and-conquer until I know better what I’m doing. The Adafruit examples show how to set up a single display to a single Feather, and I’m sure that there’s no shortage of beginner tutorials about hooking up individual buttons and potentiometers to the Pi. (Not to mention that it would make it possible to run the smaller displays independently, triggering sequences from the master Pi controller).
Thanks again for all the info, and for making me optimistic that I might actually be able to get something working!